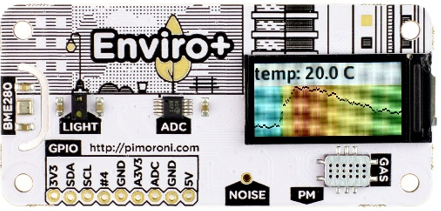
pi-enviro with Enviro+ hat for raspberry pi
Couple weeks ago, I was looking at interesting projects for Raspberry pi and I was also looking at air quality testing and came across Pimoroni Enviro+ raspberry pi hat. Which is great! I’m reasonable with Python and raspberry pi and would love to see what I can do with the both for fun! Well, my version of fun anyway.
Contents:
1. Ordering unpacking
2. Setup
3. Outdoor enclosure
4. Review: Good bad and ugly (I have the saying in my head at the moment)
1. Ordering unpacking
Put the order in directly from https://shop.pimoroni.com/products/enviro?variant=31155658457171 which are in the United Kingdom and got the package a week or two later in Brisbane, Queensland
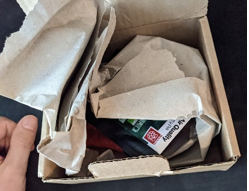
Comes in cute packaging and all the instructions are online. Which I like to see these days so then they can keep it up to date
2. Setup
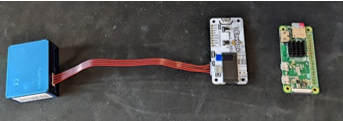
Got to put all the pieces together, which is handy if you already have a raspberry pi zero w.
Assuming you have a fresh install of Raspbian the setup should be pretty easy and I won’t repeat what the good people at Pimoroni have here. https://learn.pimoroni.com/article/getting-started-with-enviro-plus#how-to-attach-enviro-to-your-pi
If you have a Particulate Matter sensor then I would urge you to do the extra setup with Luftdaten too, which is a great opensource project for collecting data for all over the world for air quality.
If you are up to here, now we can install some extra software if you like that runs luftdaten_combine.py as well as some sauce on top including logging data to a database and auto updating
curl -LJO https://raw.githubusercontent.com/LukeKeam/pi-enviro/master/install.sh && sudo sh ./install.sh
 When you first start it up it is going to take 10+ mins for the some the sensors to find their bearings and get better data.
3. Outdoor enclosure
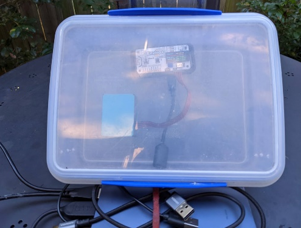
Made an outdoor enclosure for it, which is just some plastic food container with a hole in the bottom. It does need a bit more ventilation for outdoor use. A good one is on the Primorni site.
Had it hooked up to a battery pack which lasted for a couple days, as this is testing, I didn’t want to get carried away and mount it outside yet. I have lots of testing to do inside first.
4. Review: Good bad and ugly
Good: Loving
• Great looking hardware
![]()
• Great LCD displays!
• Easy setup guide from the Pimoroni site with a rundown on how things work https://learn.pimoroni.com/article/getting-started-with-enviro-plus#how-to-attach-enviro-to-your-pi
• Sample code on github
• I also made a github page https://github.com/LukeKeam/pi-enviro that edits luftdaten_combined.py and sends data to a local sqlite db. Feel free to contribute
• Very low power usage
Bad: Could work on
• Can be overwhelming for someone with no coding skills to get stored data or know what to do next
• Sensors could have some better suggested ranges and better readings. I know this is a very very hard task! As you will get different readings for different altitude, devices, cases, temperatures, etc
• Fyi tap the button means tap the light sensor! Found this out by accident
• Mic code not integrated yet, looks like they are testing it on github though
Super fun and cool project hope we can iron out the little things that aren’t working properly yet

Luke Keam
techgeek.biz
FOLLOW US